Gestión de aplicaciones
Consulta la información esencial para trabajar con nuestras APIs
Documentación
Puedes usar esta documentación para las siguientes unidades de negocio:
My first application
Create an application in Mercado Libre
Look at the steps to create an application into Mercado Libre and work your integration:
- Create an account at Mercado Libre.
- Go to our DevCenter.
- Click on “Create an application.”
- Fill out all mandatory data. In “redirect URI" fill out domain root:
- In "Topics," you can select your interest in receiving notifications and in “Callbacks URL Notifications” we will set up a route to receive notifications on those topics.
- Take into account that the notification callback url is filled out with our application base URL (in this case, http://localhost:3000) plus a so called /notifications route. Mercado Libre will make requests for this route whenever something relevant happens with the selected topics. For further information see notification documentation. Save the project and you will be redirected to the homepage where your application will be included. You can see your ID and secret key shown by your application. With these values, we can start integration.

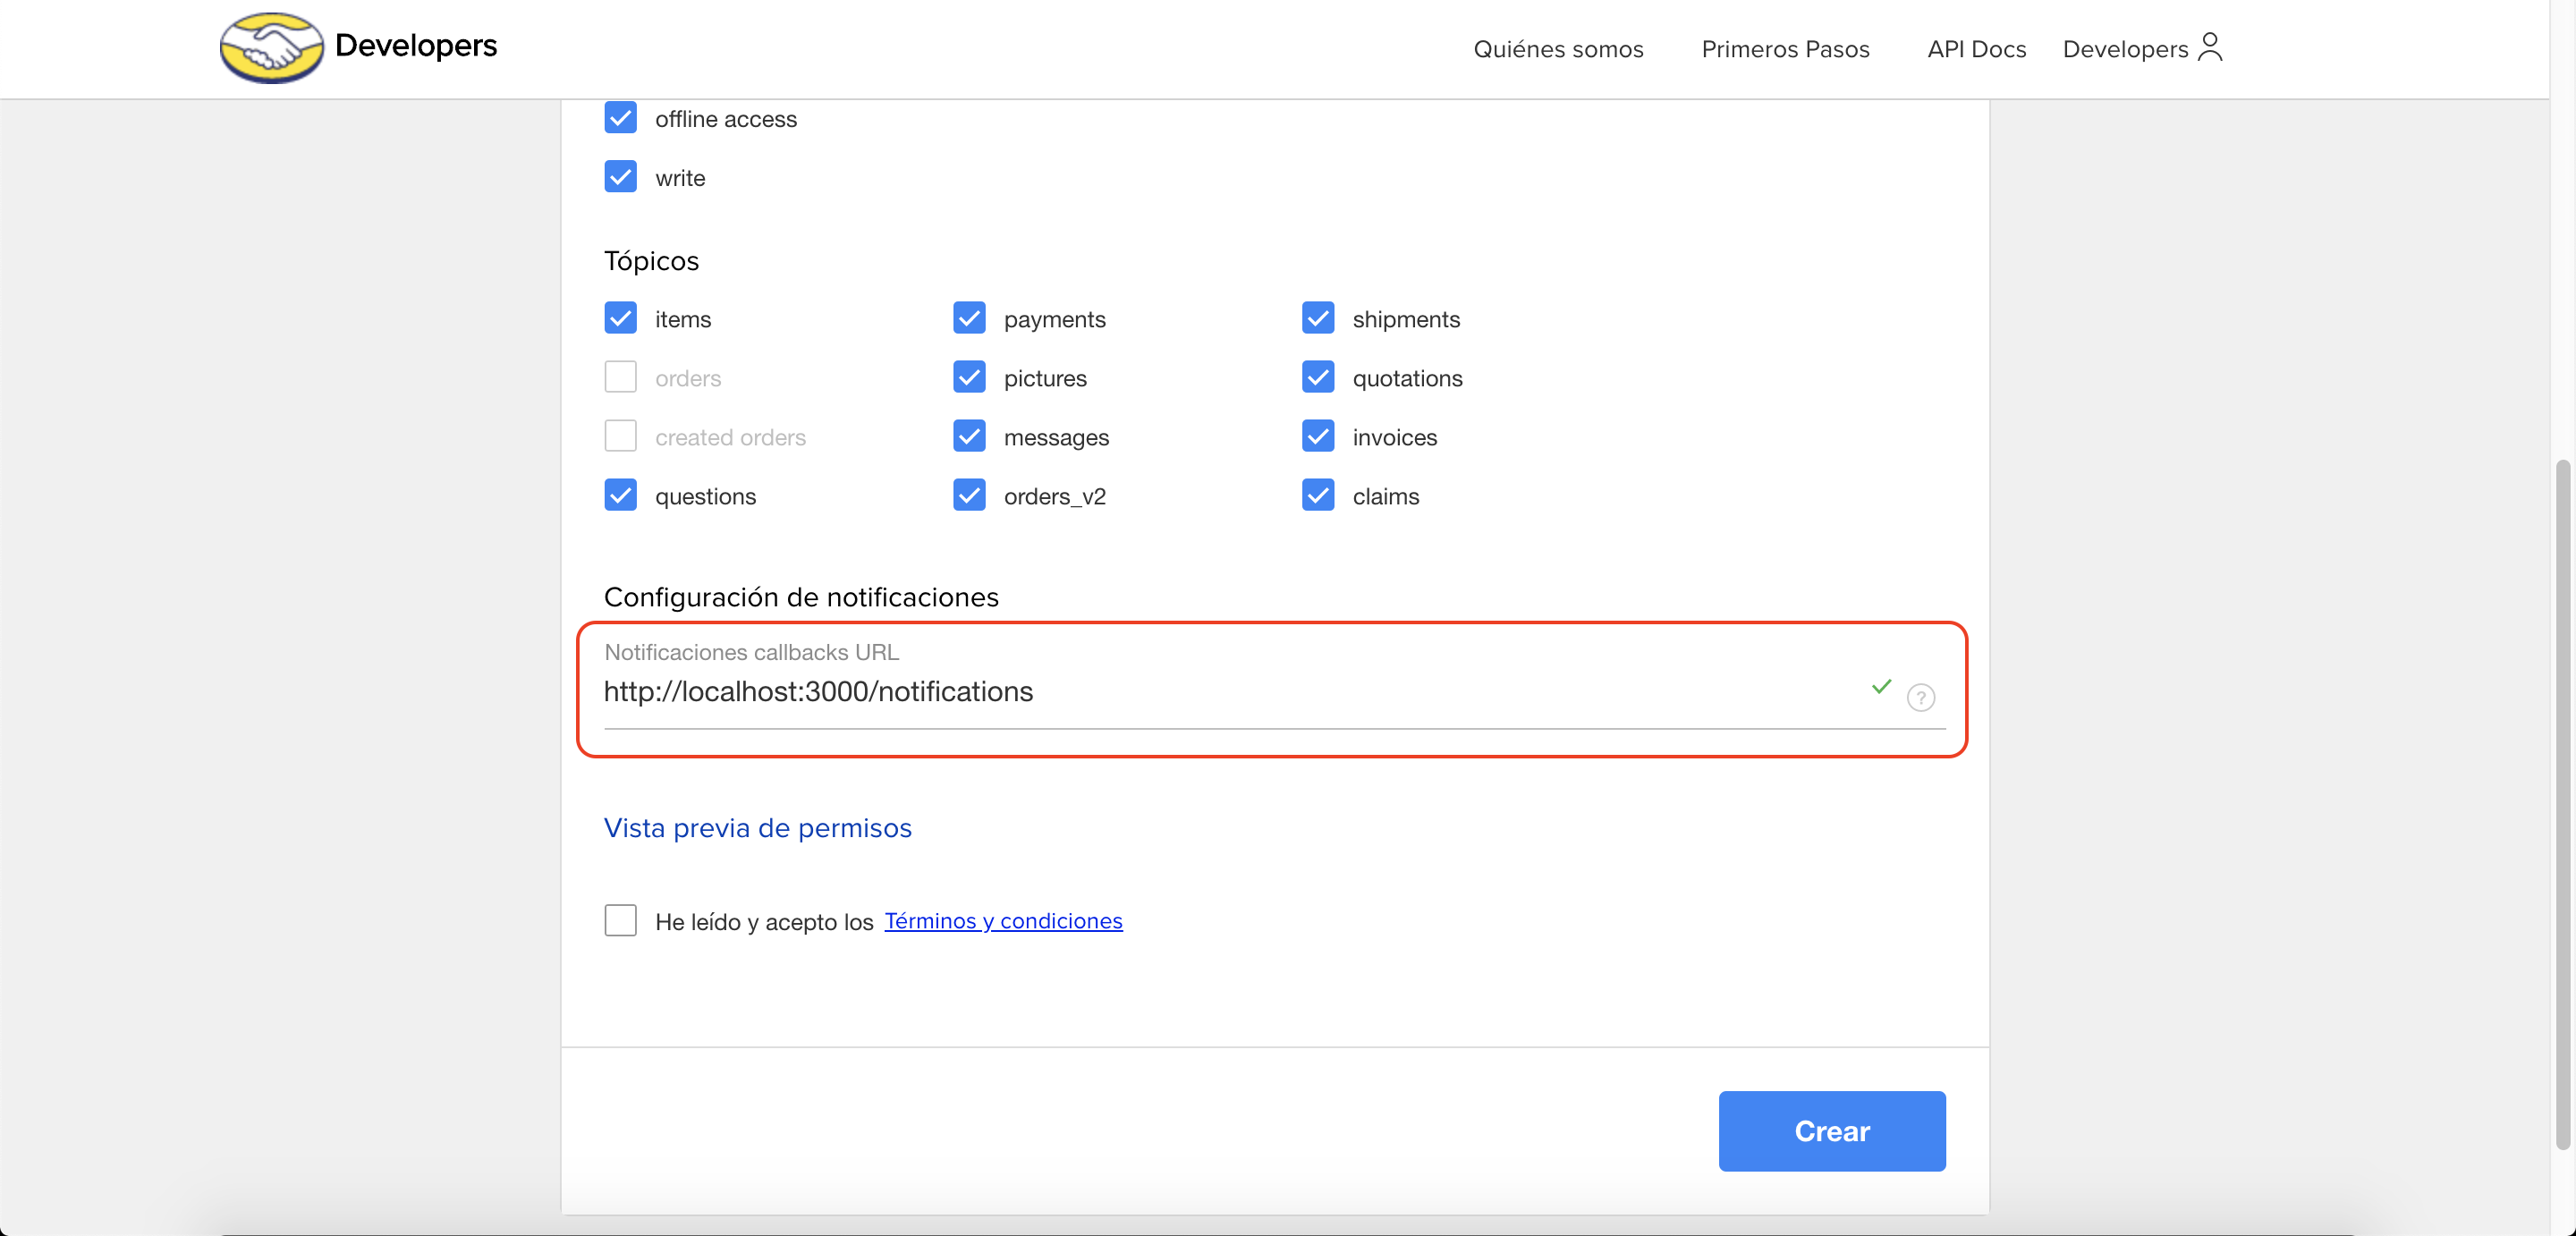
Remember that "localhost" is a temporary URL to be replaced as soon as it is implemented.
Start development
Now that the project is installed and you have an application created in Mercado Libre. Create a .env file, to be used to insert our confidential information variables in code without sharing versioning platforms and code collaboration, such as GitHub, GitLab, Bitbucket, etc.
Copy .env.example file content, and paste it in the file you already created and fill out the variables. You will get the following result:
  CLIENT_ID={The ID of your application in Mercado Libre}
  CLIENT_SECRET={The key of your application in Mercado Libre}
  REDIRECT_URI=http://localhost:3000
  SYS_PWD={The password that you want to use in your system}
Your application is ready for local use! In your command line tool, execute npm start command, access URLhttp://localhost:3000 and go to URL http://localhost:3000. Now that our application is executed, we can continue with the implementation phase.
You can stop execution at any time hitting Ctrl+C.
Deploy for Heroku
Heroku is platform as a service (PaaS) that supports different languages and allows developers for cloud-based application creation and upload.
To implement in Heroku, we first need to know Node.js version we are working with. Execute node --version in your online command tool and copy appearing numbers.
Open package.json package and, at the file end, change property "engines" to get your version numbers.
After this, install Heroku CLI. To do this, go to Heroku page and download it.
Git will be used for Herouk project. Execute git init command. Then execute git add command, and finally, git commit -m "first commit" command. You can exchange "first commit" message for any message you want.
To create your application in Heroku, follow these steps:
- Log in Heroku with
heroku logincommand. - Once logged in, execute
heroku create my-meli-application. You can change "my-meli-application" for any name you want. The application name will define the URL to be used for access to your application. For further information, . Puedes cambiar "my-meli-application" a cualquier nombre que desees. El nombre de la aplicación definirá la URL que usará para acceder a su aplicación. Para obtener más información, go to Heroku documentation. - To upload files to Heroku server, execute
git push heroku mastercommand..envfile variables should not go directly to the server. There is a way to create direct configuration variables from command line. Execute commands:heroku config:set CLIENT_ID={APPLICATION ID IN MERCADO LIBRE}heroku config:set CLIENT_SECRET={APPLICATION SECRET KEY IN MERCADO LIBRE}heroku config:set REDIRECT_URI=https://{APPLICATION-NAME}.herokuapp.comheroku config:set SYS_PWD={PASSWORD TO BE USED IN SYSTEM}
Finally, to see your application working, execute heroku open command. A browser window will be opened in Heroku application web site.
Adjustments in Mercado Libre
Now that you posted your first application, the URL will no longer be "localhost." Go back to Mercado Libre DevCenter to make the relevant adjustments.
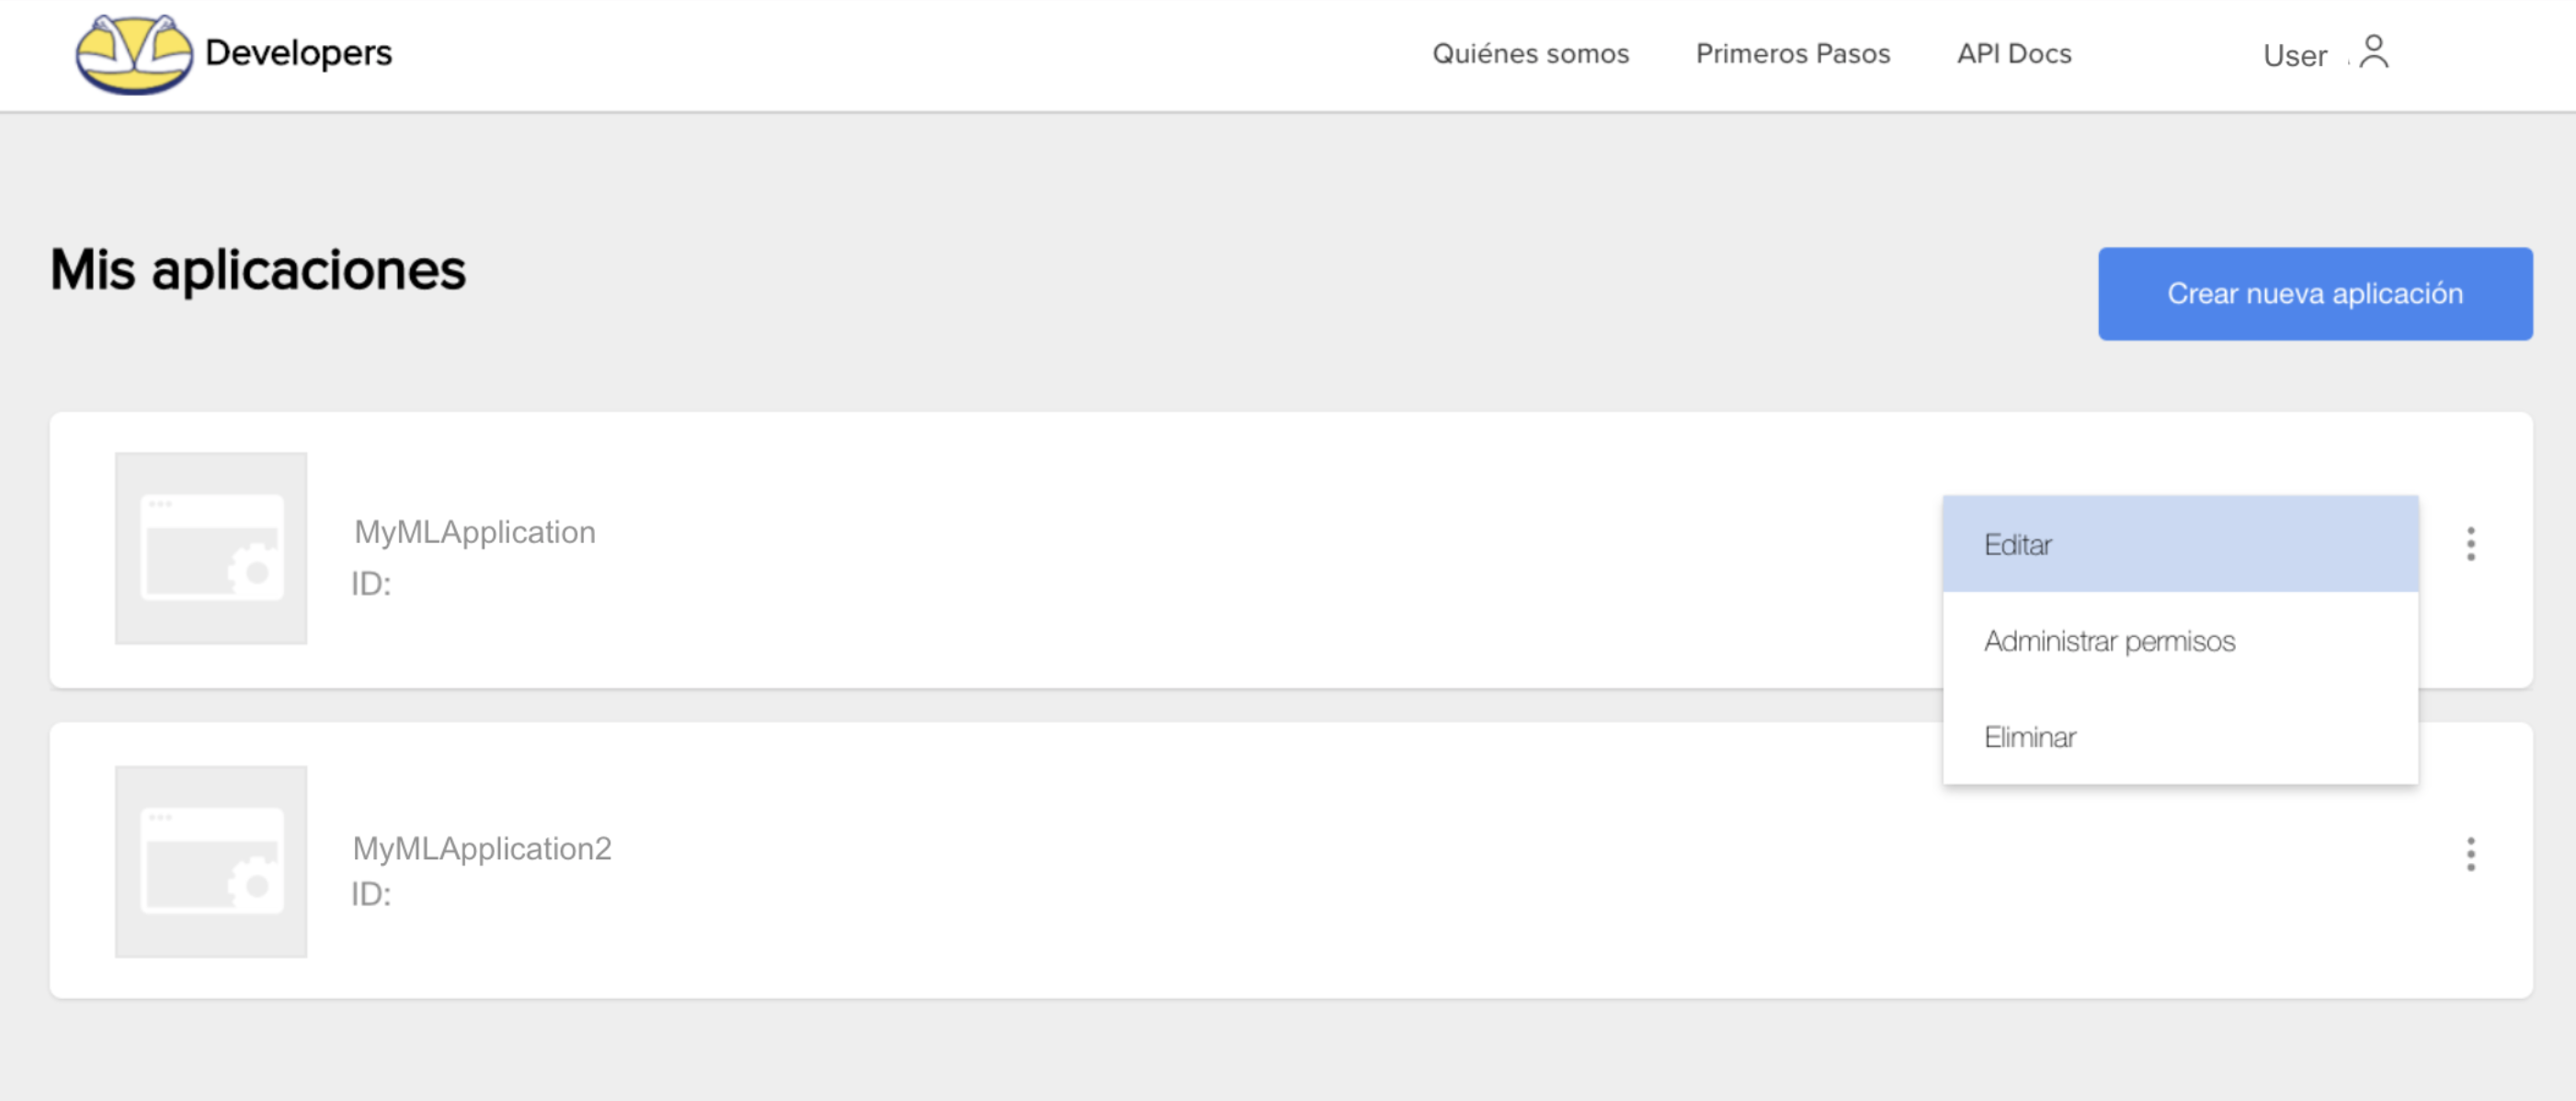
- Go to our DevCenter again.
- Click on three dots and then "edit" to edit your application:
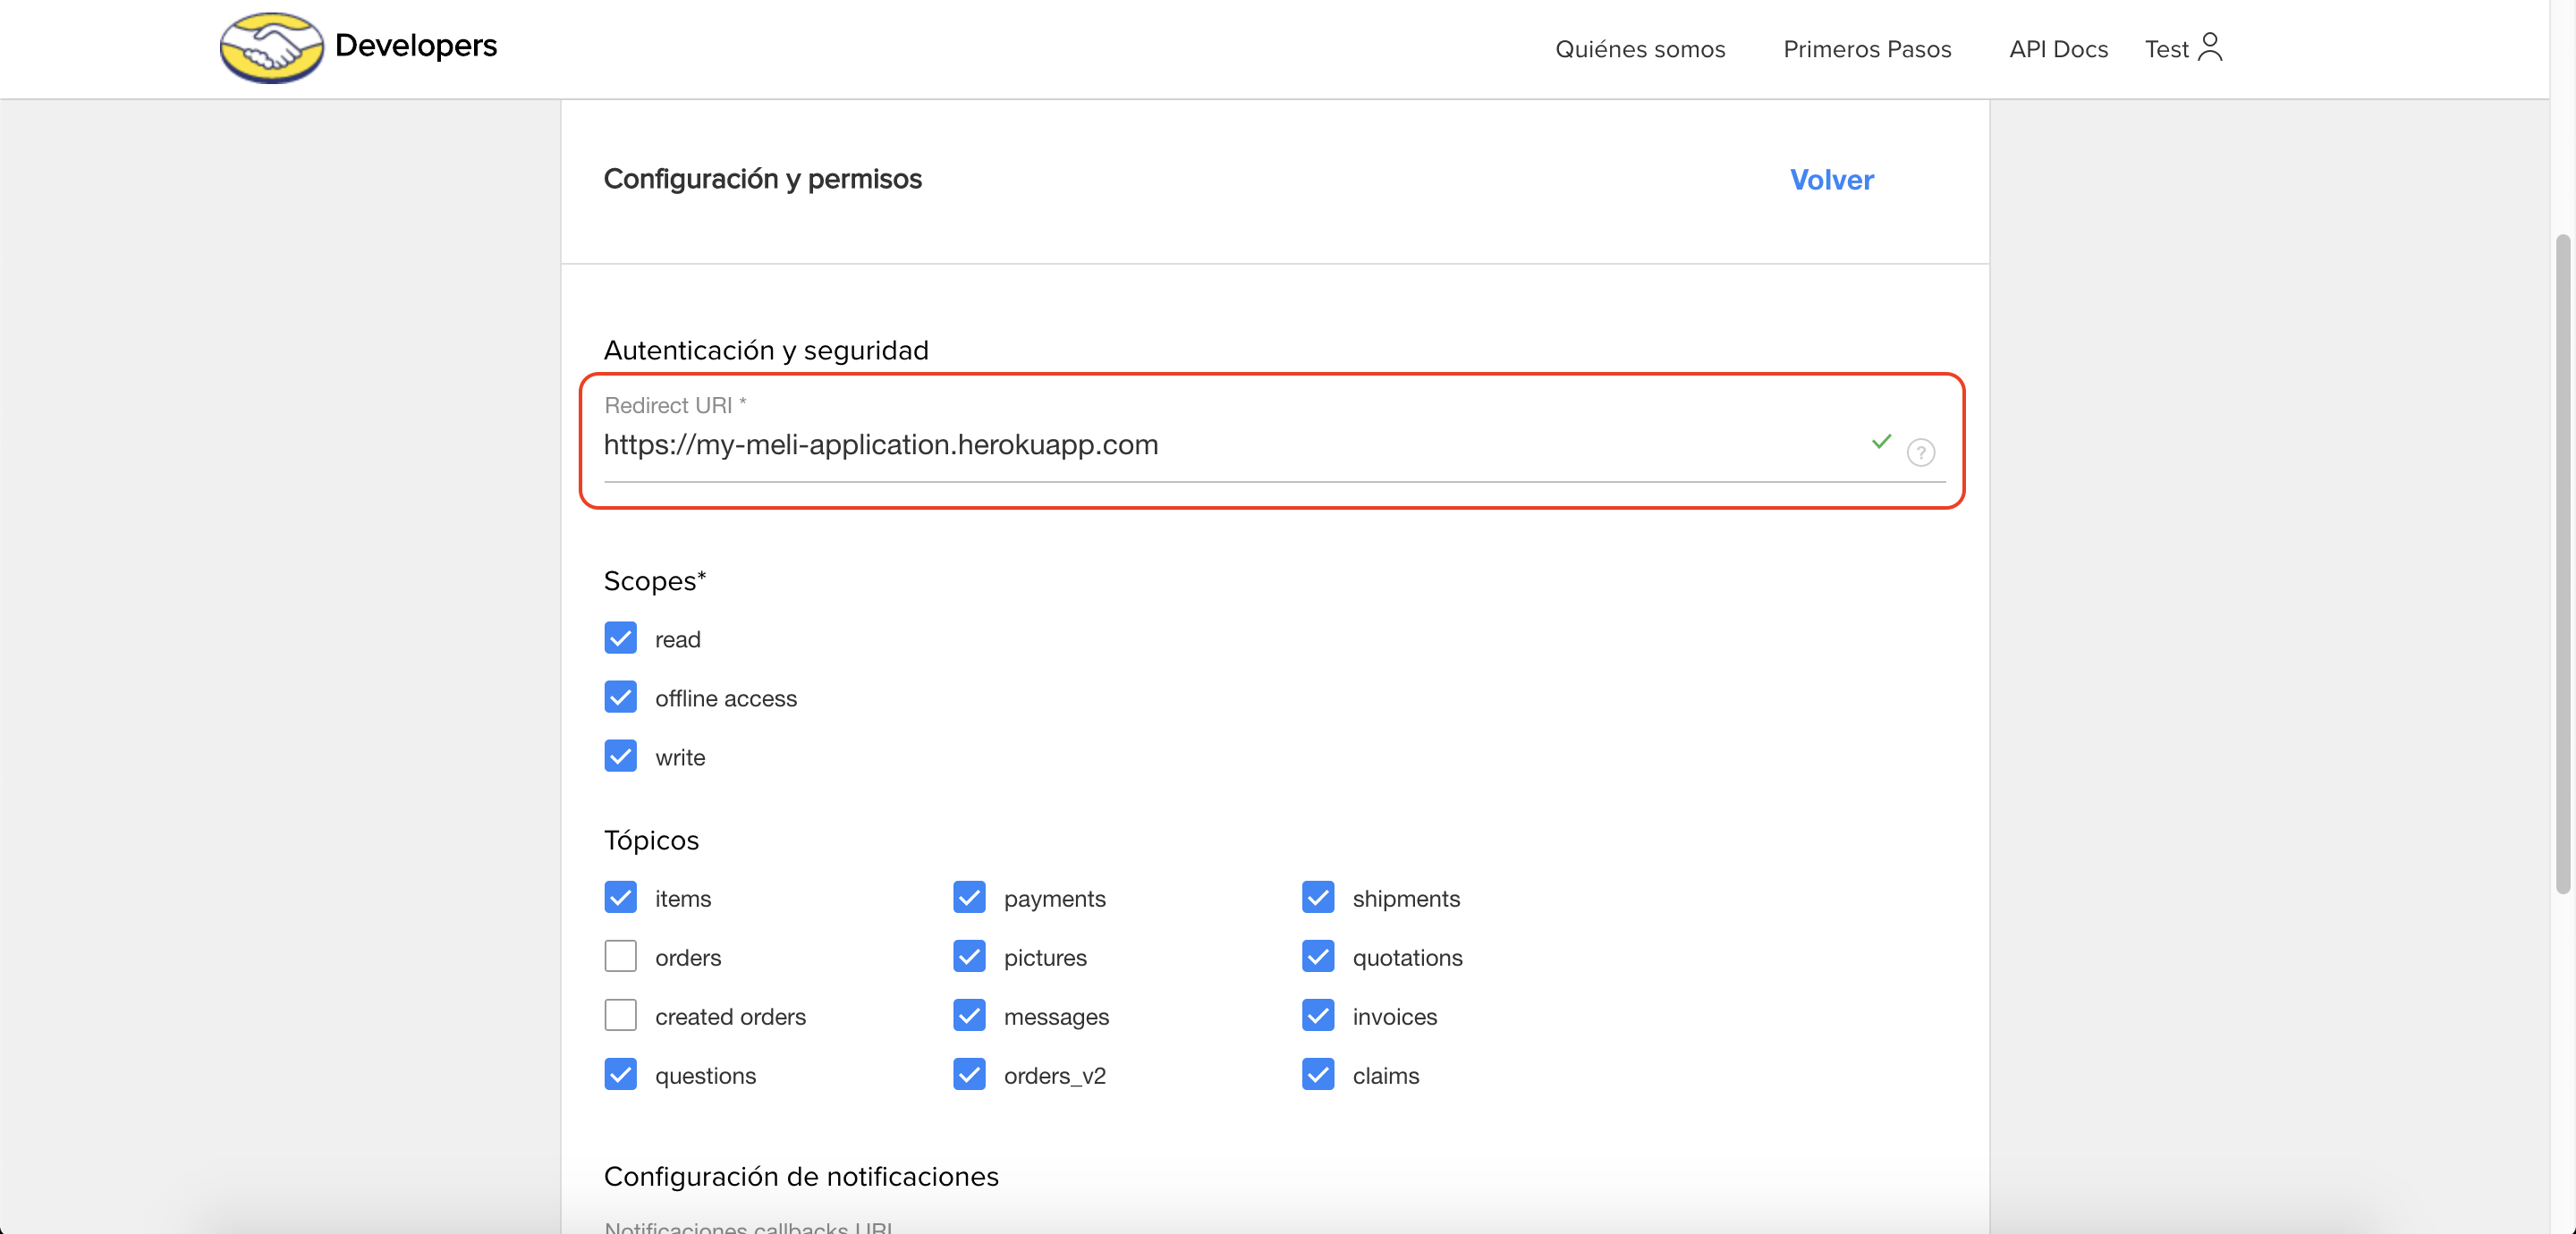
- Change "redirecting URI" to a new URL provided by Heroku. This URL should be the same as the one in configuration variables, that is, similar to https://{HEROKU-APPLIATION-NAME}.herokuapp.com.
- Also change “notification callback URL”:

Route configuration
For better understanding of route system in this small integration, let us prepare a screen with item list.
Open app.js file and add the following code before module.exports = app:
app.get('/posts', validateToken, async (req, res) => {
  try {
    const meliObject = new MeliObject(res.locals.access_token);
    const user = await meliObject.get('/users/me');
    const items = (await meliObject.get(`/users/${user.id}/items/search`)).results || [];
    if (items.length) {
      const result = [];
      const promises = items.map(item_id => meliObject.get(`/items/${item_id}`));
      for await (item of promises) {
        result.push(item);
      }
      res.render('posts', { items: result });
    } else {
      res.status(404).send('no items were found :(');
    }
  } catch(err) {
    console.log('Something went wrong', err);
    res.status(500).send(`Error! ${err}`);
  }
});
res.render('posts', { items: result }) code line refers to page rendering code, called posts.ejs in views directory.
Create this posts.ejs page in views directory and add the following code:
<!DOCTYPE html>
<html lang="en">
<head>
  <meta charset="UTF-8">
  <meta name="viewport" content="width=device-width, initial-scale=1.0">
  <meta http-equiv="X-UA-Compatible" content="ie=edge">
  <title>Posts - My Meli Application</title>
  <link rel="stylesheet" type="text/css" href="/css/style.css" />
</head>
<body>
  <div class="container">
    <div class="items-list">
      <% for (item of items) { %>
        <a target="_blank" rel="noopener noreferrer nofollow" href="<%= item.permalink %>">
          <div>
            <img src="<%= item.secure_thumbnail %>" />
            <h3><%= item.title %></h3>
          </div>
        </a>
      <% } %>
    </div>
  </div>
</body>
</html>
Updates
As you implement new functionality in your development, consider that you will need to upload these updates to Heroku.
To make this process, repeat the previous steps:
- Run
git add .command to add files in stage. - Run
git commit -m "agrega pantalla de listado de ítems".You can change the message to find it faster but we recommend to always keep a short clear text related to the changes made. - To upload files and server restart, use
git push heroku mastercommand.